You can download Octopus to your LG WebOS device from the link here :
https://octoservice.net/storage/lg/webos/com.lg.app.signage.ipk
Installation via the Internet
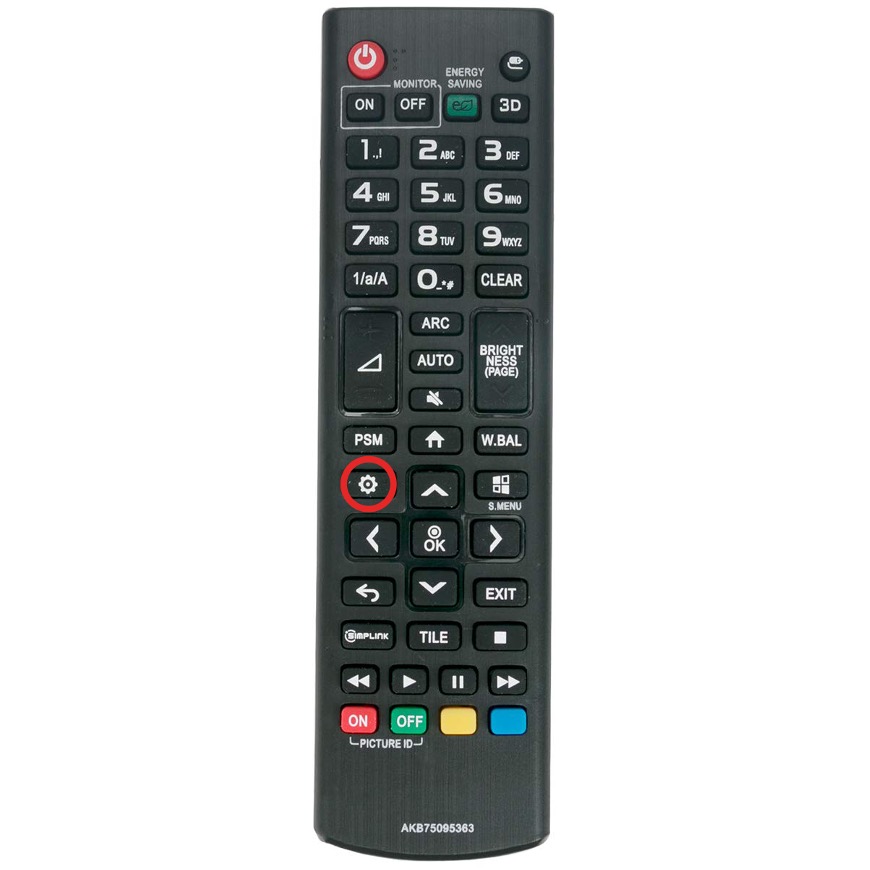
- Press the “Settings” button on the remote control and enter the settings menu.
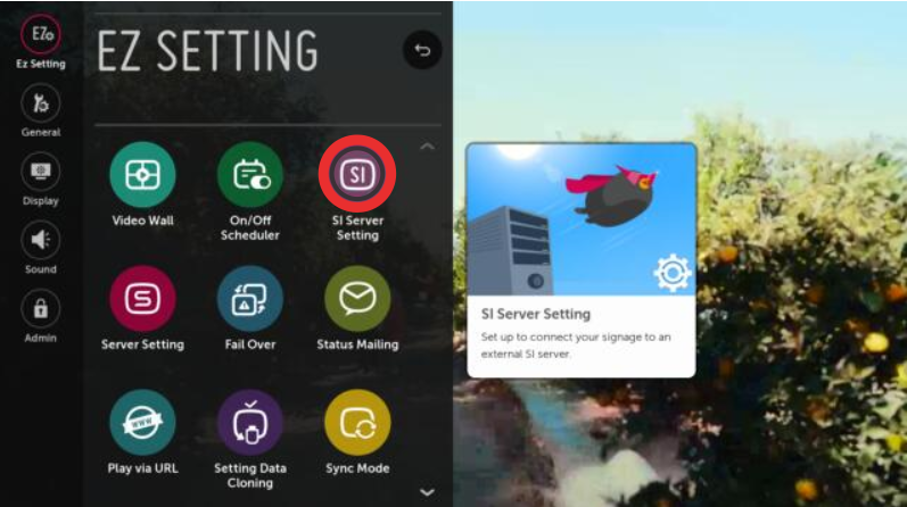
2. Select the “SI Server Setting” option in “EZ Settings” in the settings menu.
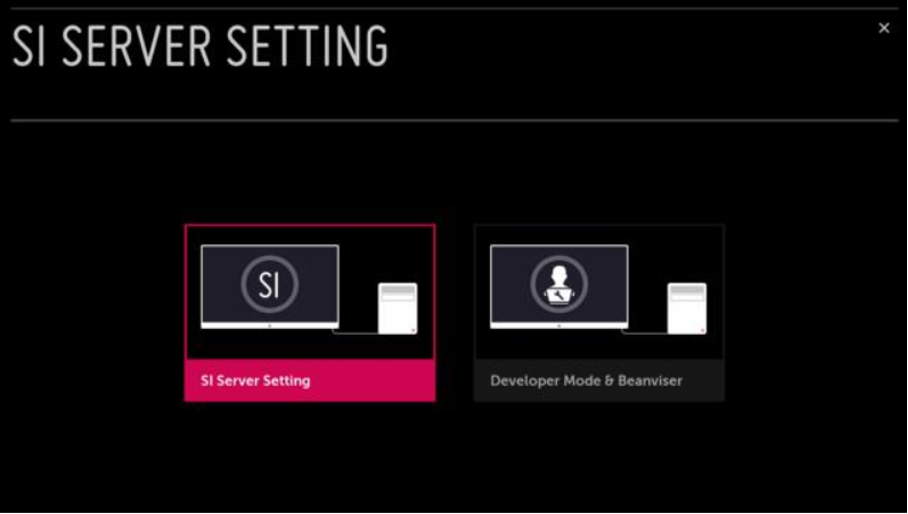
3. In the menu that appears, select the “SI server Setting” option again.
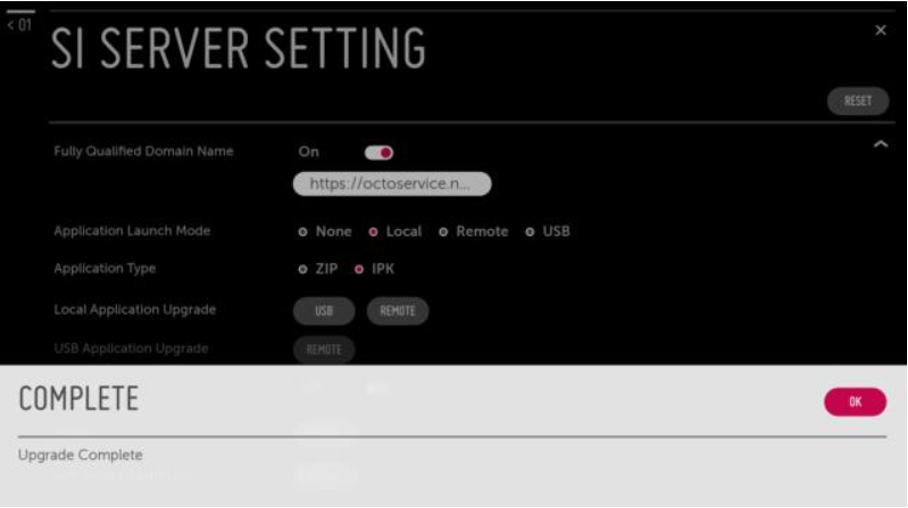
4. On the SI Server Setting screen, the Fully Qualified Domain Name (FQDN) option is selected as “On“
5. Enter the address “https://octoservice.net/storage/lg/webos/com.lg.app.signage.ipk” in the address field.
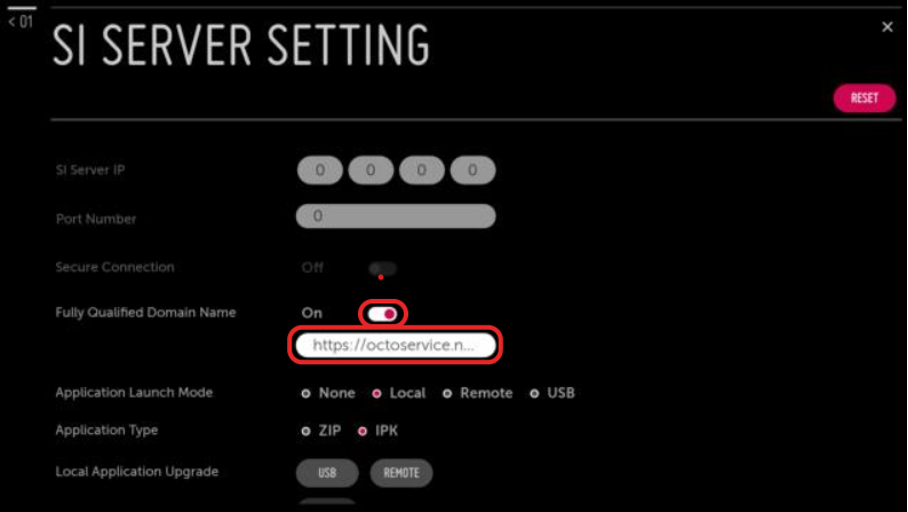
6. Application Launch Mode is selected as “Local“.
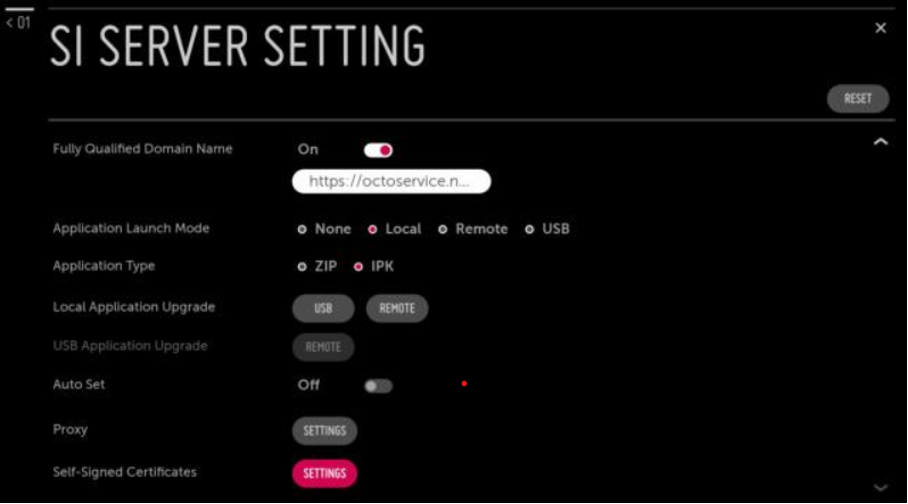
7. Application Type is selected as “IPK“.
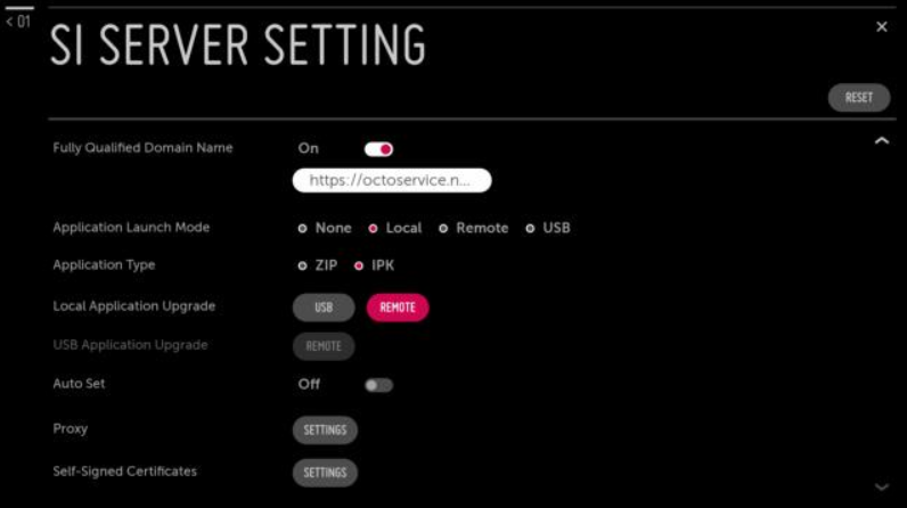
8. Press the Remote button.
9. When asked whether you want to request an Application Upgrade, select the “Confirm” option and continue.
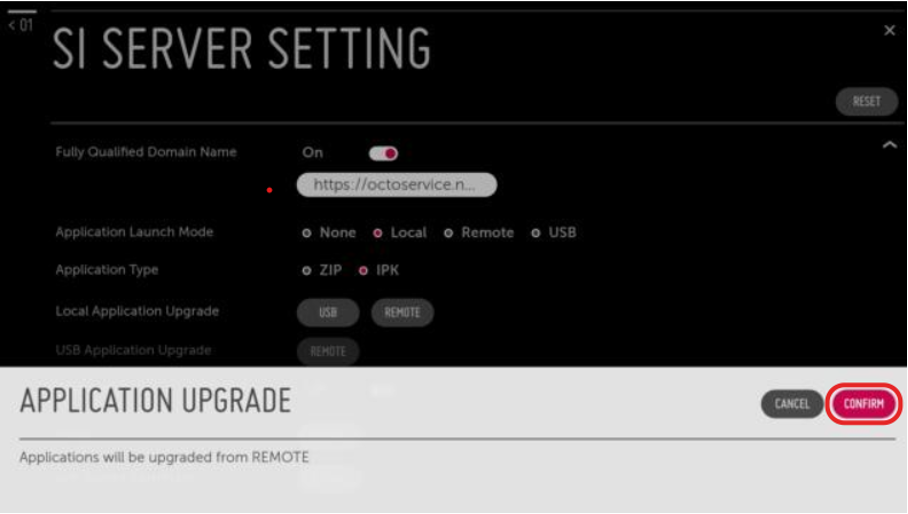
10. Installation of the application is completed.
11. After this step, turn off the screen and turn it on again.
12. After a while after the screen turns on, a message appears stating that the application has been installed.
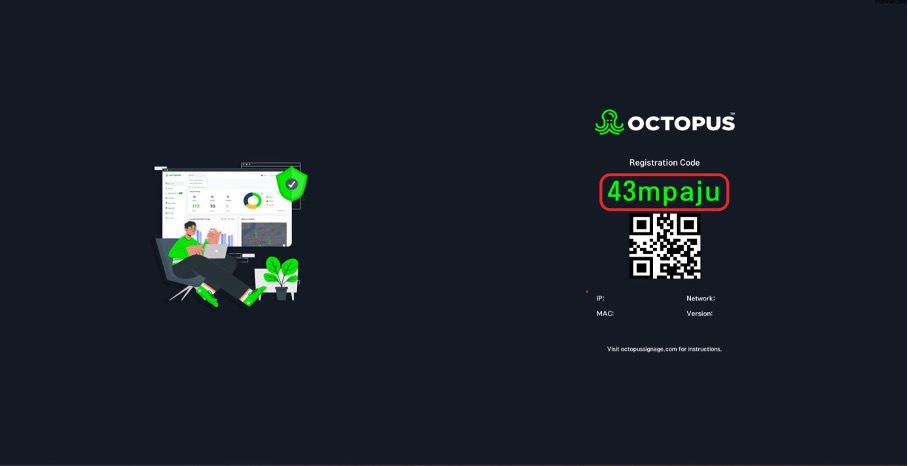
13. After this step, you can add your screen via Octopus CMS Panel with the 7-digit installation tag. To do this, visit the “Creating a New Screen” section.