
How to Create a New Screen?
To add a new screen, first click on the“Screens”button in the left menu, then click the“Create Screen”button on the right side.
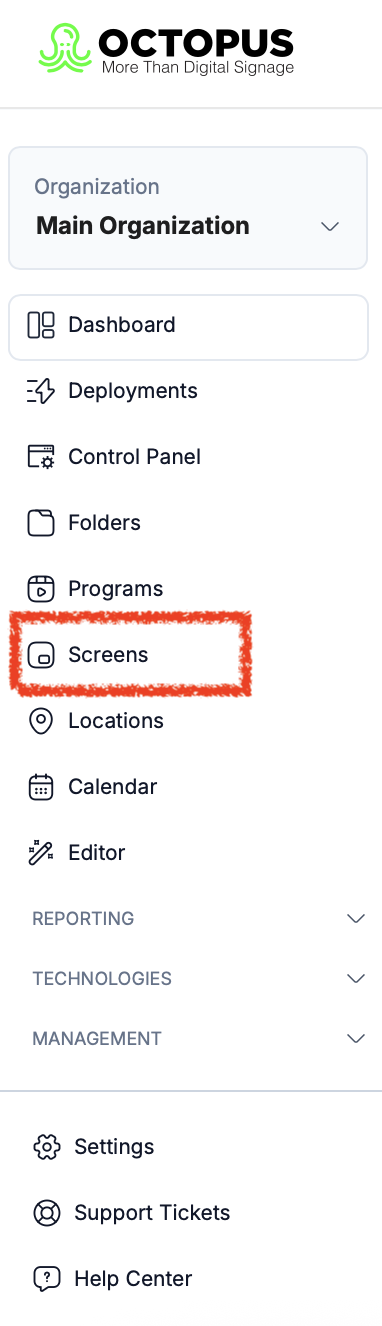
Creating a New Screen
In the“Create Screen”section, you need to fill in the required information and select the desired program(s) for the screen.
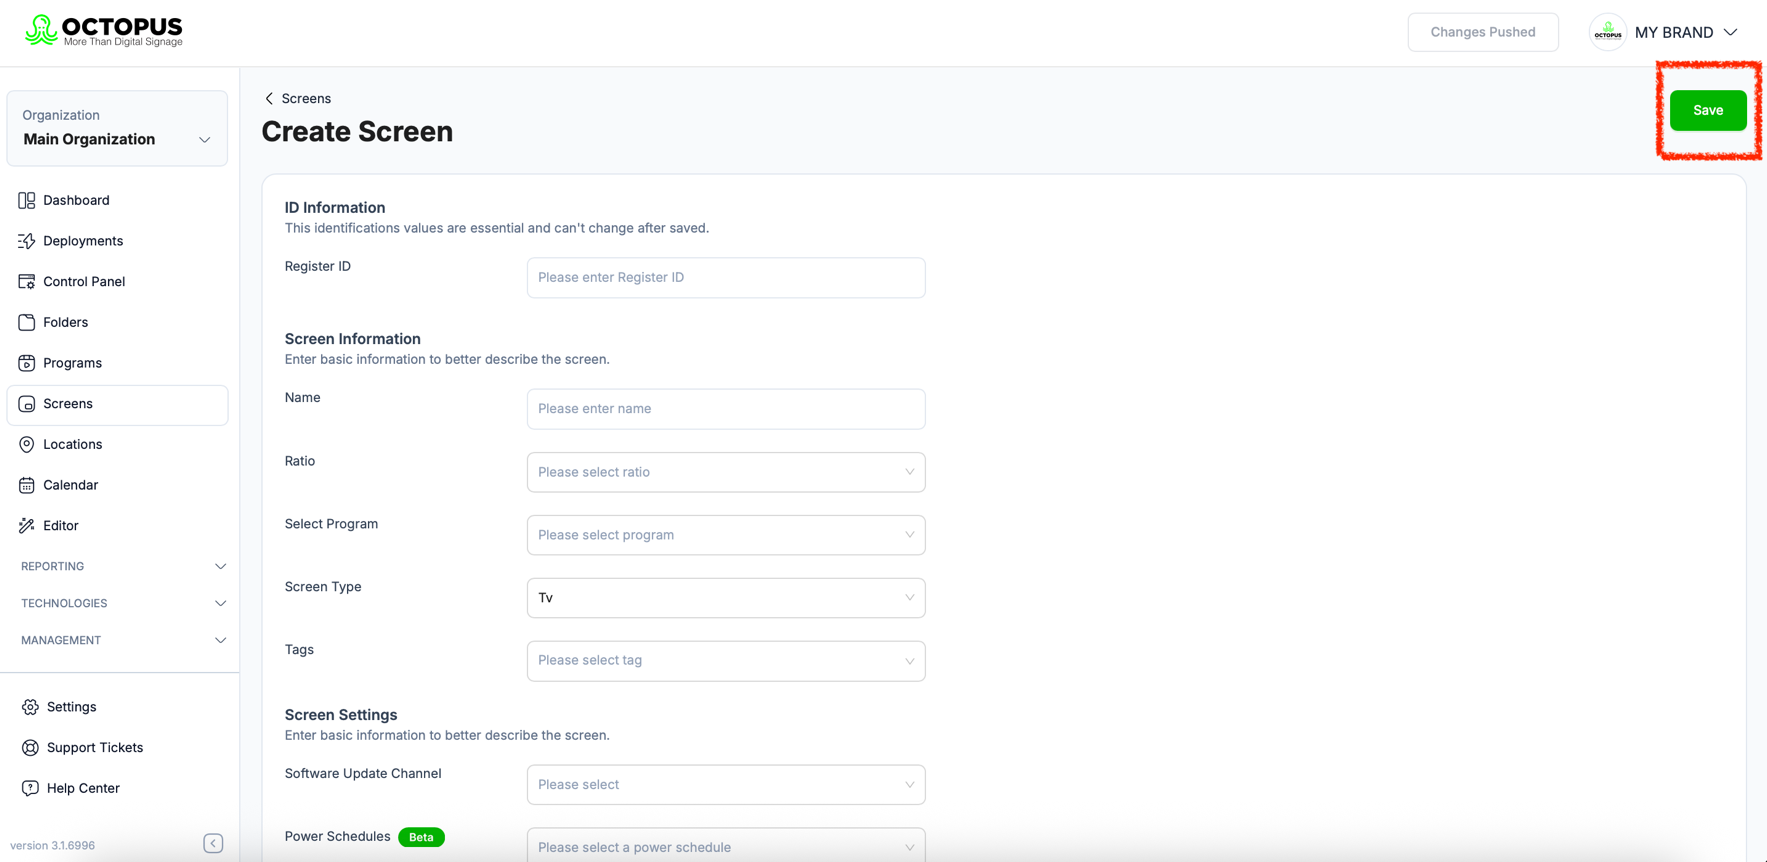
- Enter the7-digit registration numberof the screen.
- Provide anamefor your screen.
- Select abroadcast programfrom the “Program” section.
- If you want to assign an emergency fallback, select“Emergency Program.”
- Choose thescreen type.
- Optionally, add atagfor your screen.
- Don’t forget to select apower scheduleto define on which days the screen should turn on and during which hours it should remain active. You can create this in the“Settings”section under the“Schedules”tab.
Screen Settings
After completing the initial setup, proceed to the screen settings:
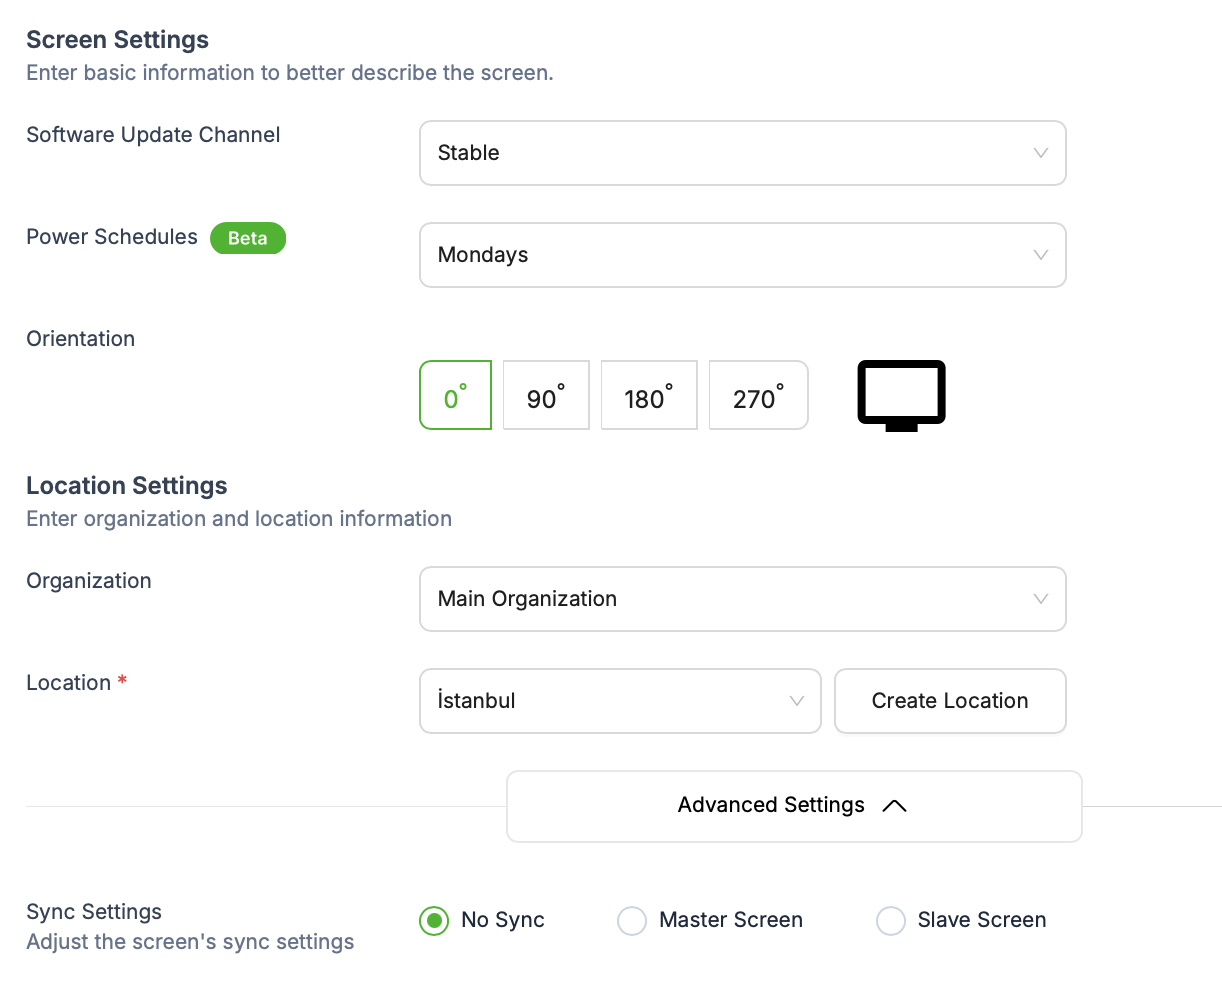
- Select theoperating schedulefor when the screen should be active.
- Choose theorientation: horizontal, vertical, 90° clockwise, or 90° counterclockwise.
- Select the Organization that will manage the screen and define its Location.
- If the location has not been created yet, click“Create Location”and define it.
- If you plan to use screens as avideowall, enable synchronization and define which screen is themain screenand which ones aredependent screens.
Advanced Settings
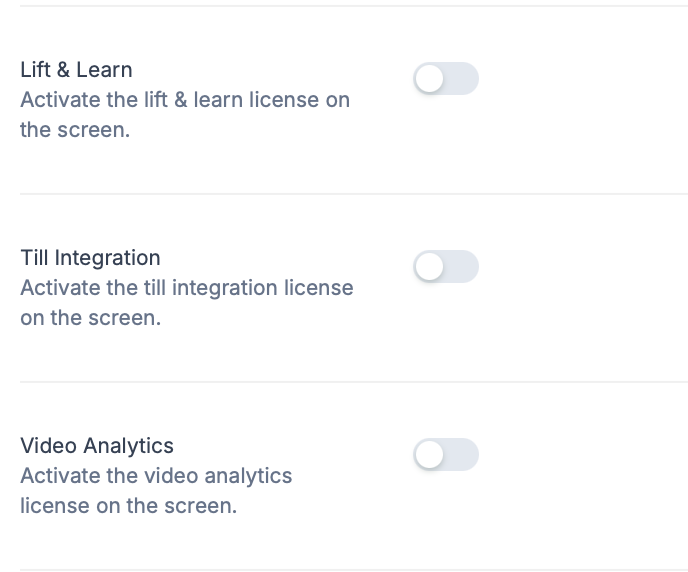
If needed, you can configure advanced settings for:
- Video Analytics
- Lift & Learn
- Till Integration
Once all configurations are complete, click the“Save”button to create your screen.
Listing Screens
After creating your screen, go back to the Screens menu. Select the checkbox next to your screen and click the“Action”button.
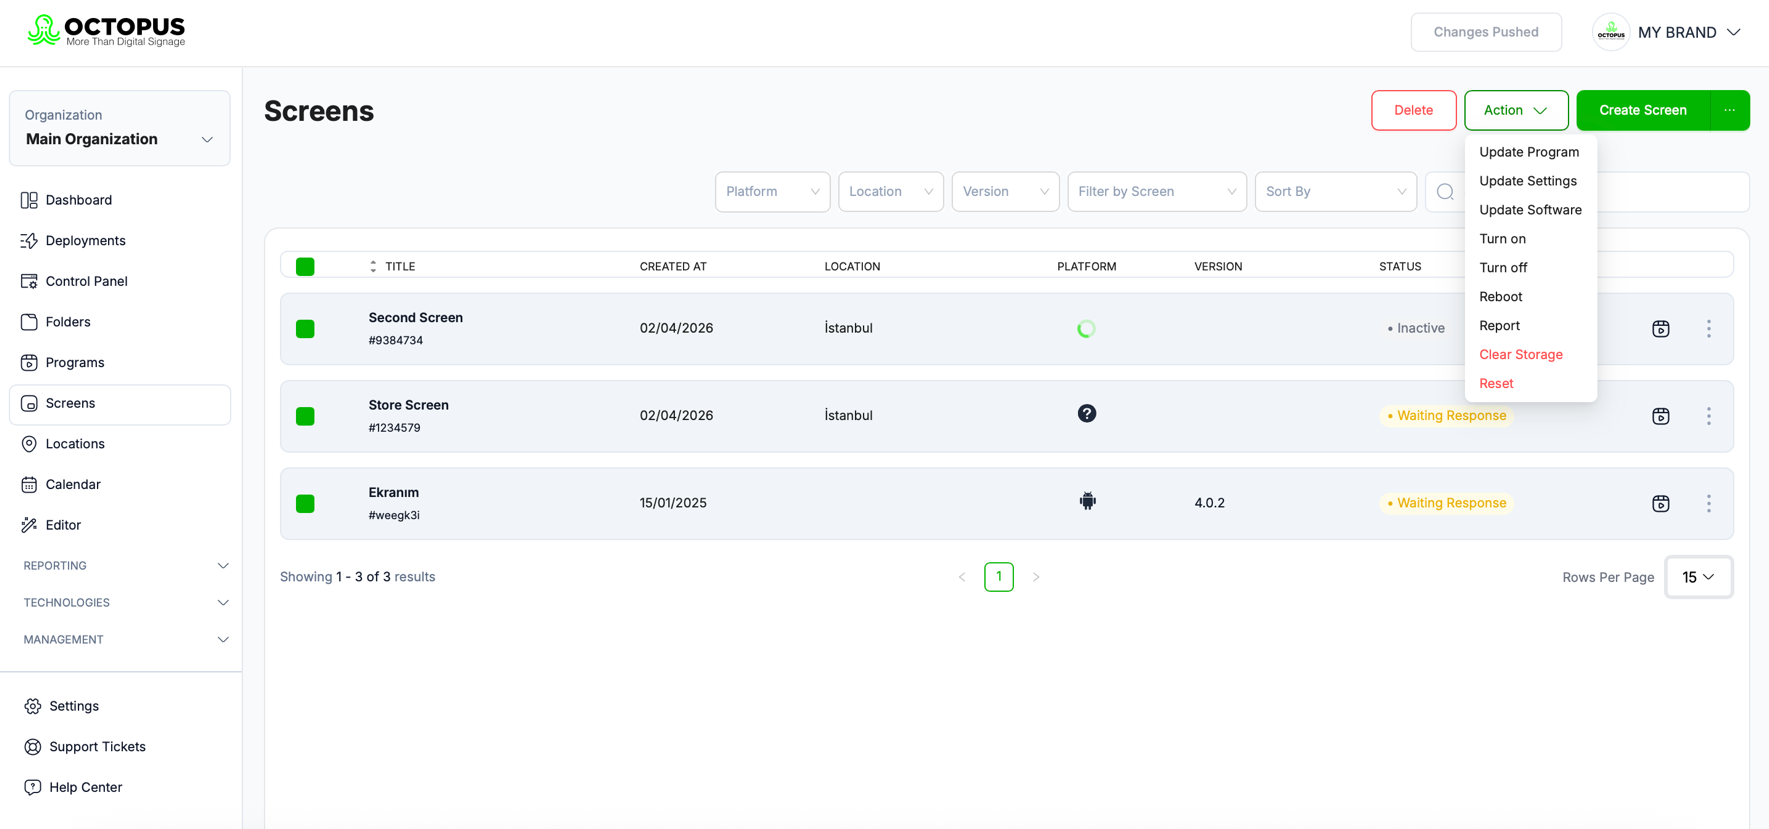
With this button, you can:
- Update Program: Updates the assigned program (if any).
- Update Settings: Applies any changes made in the settings.
- Update Software: Upgrades the screen to the latest software version.
- Turn On: Powers on the screen even if no program is scheduled.
- Turn Off: Turns off the screen even if a program is scheduled.
- Restart: Reboots the screen.
- Report: Access reporting features.
- Clear Storage: Removes unused media and data.
- Reset: Resets all changes made in the application.
- Delete (left-side button): Deletes the selected screen.
You can return to the Screens menu to select any screen you want to update or delete.
- On this page, you can update all screen-related information.
- To delete a screen, click the button in thetop-right corner.
Viewing Screens
Go to the Screens menu and select the screen you want to view.

Click the three-dot menu next to it and select“View Details”to monitor your screen and check whether it is functioning properly.
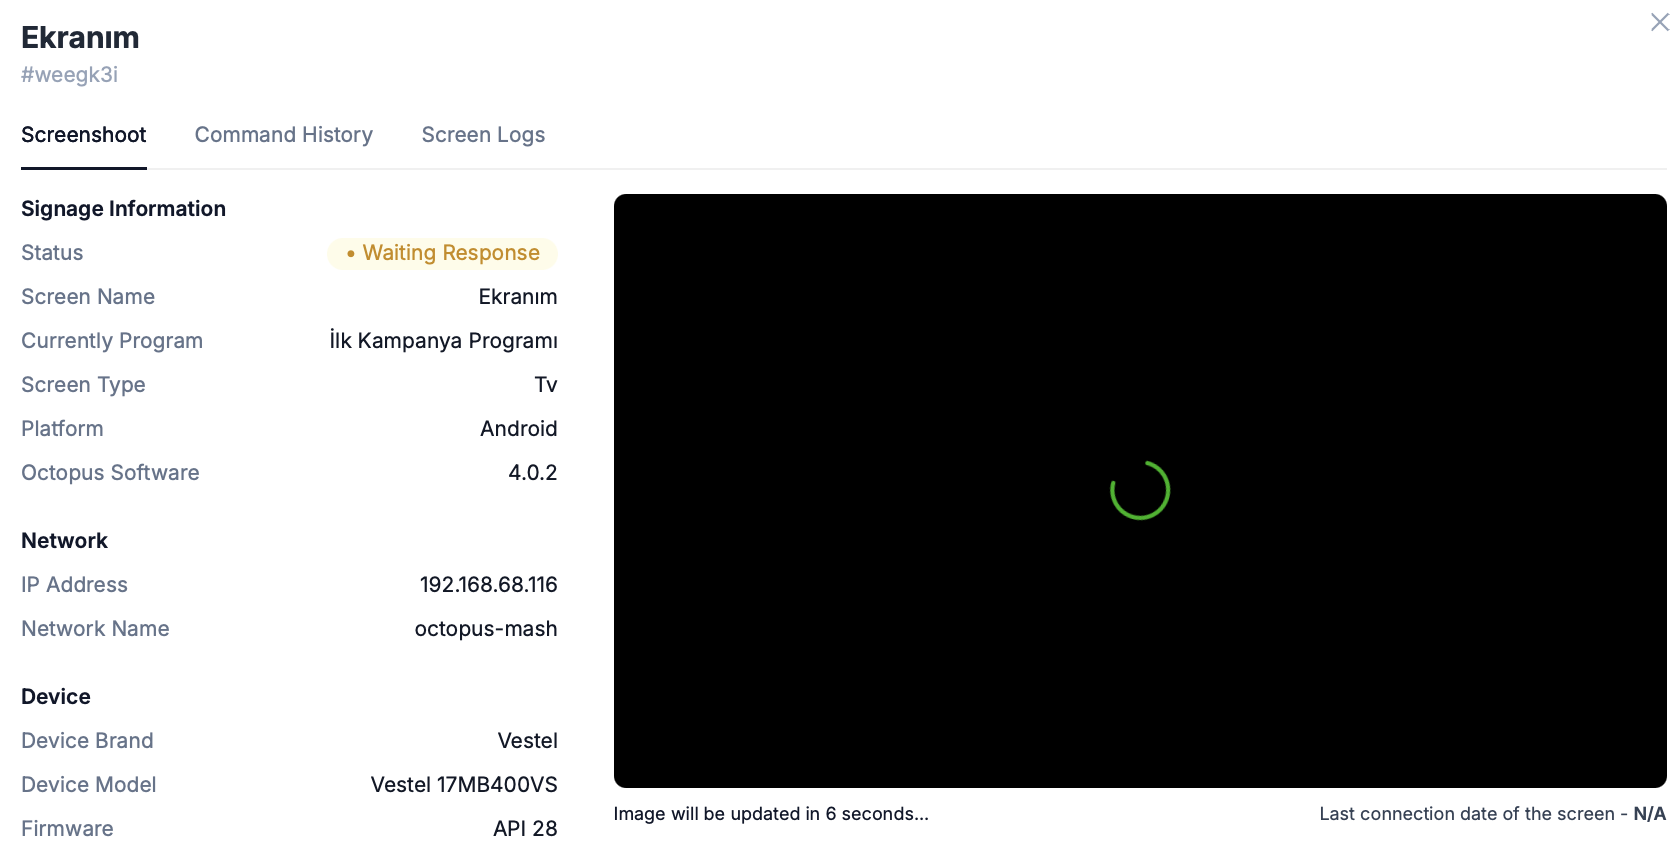
You can also view device information for all published screens, including:
- TheIP addressof the connected network
- Theorganizationthe screen belongs to
- Device brand
- Device model